
Introduction to Cheese Danish Delight Recipe: Discover an Irresistible Treat
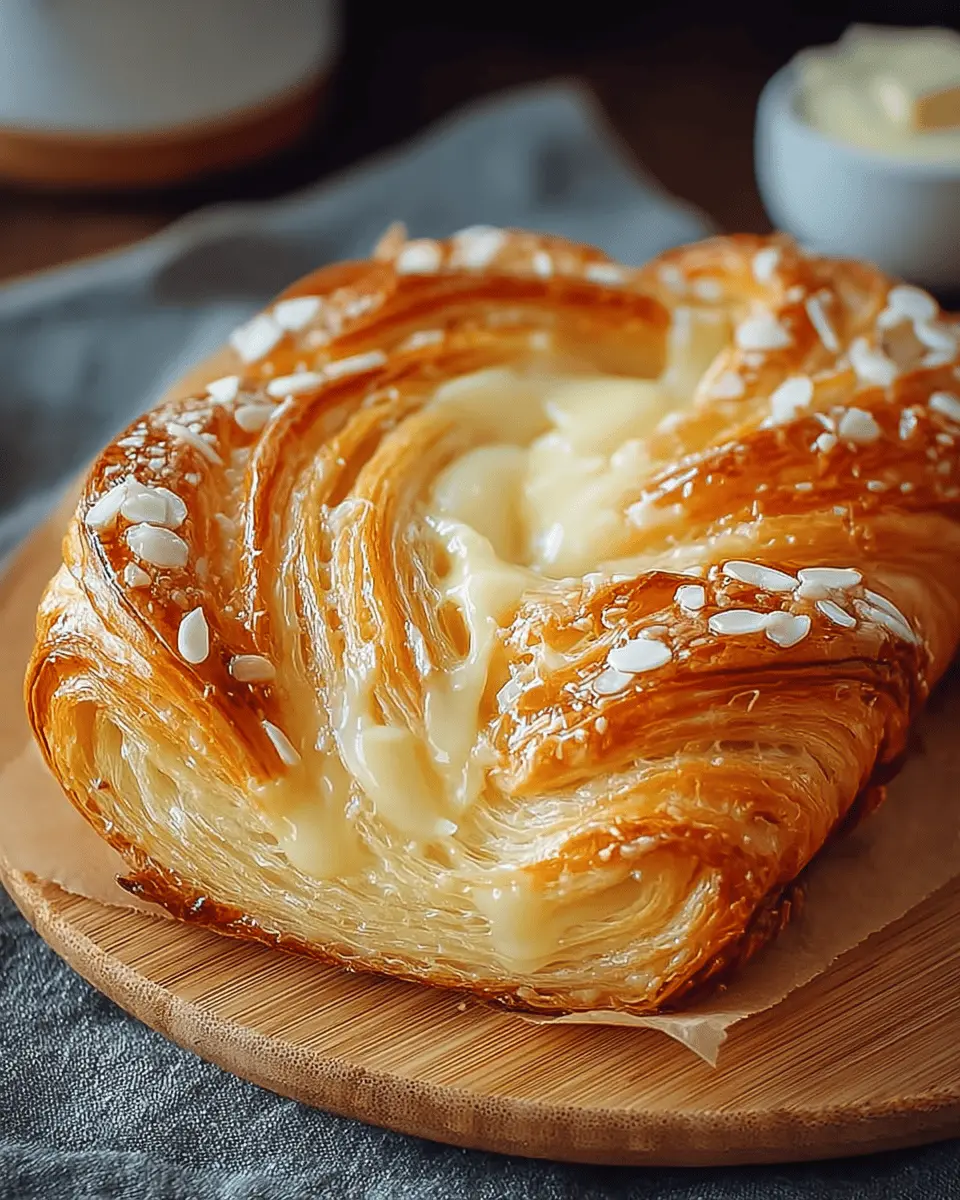
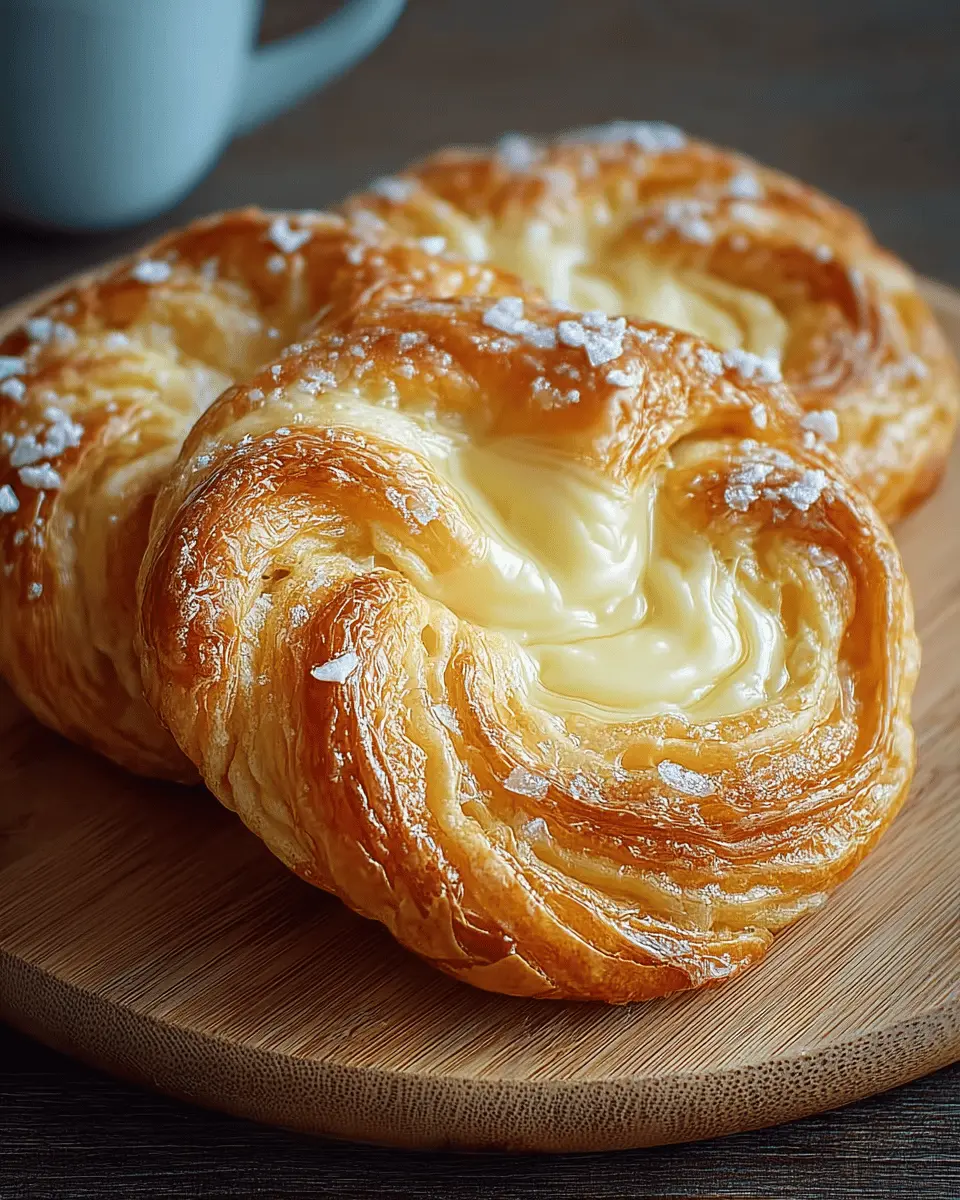
The Cheese Danish Delight Recipe brings a delightful twist to your mornings and snack times, allowing you to indulge in a sweet, creamy treat from the comfort of your kitchen. Imagine the aroma of freshly baked pastries wafting through your home, inviting everyone to gather around the table. It’s a moment of joy that transforms the ordinary into something extraordinary.
When I first attempted to make Cheese Danishes at home, I was apprehensive. However, the moment I took that first flaky bite, I realized that homemade versions offer a unique charm that store-bought pastries simply can’t replicate. The process of creating these delightful pastries is more than just baking; it’s a way to pour your love and creativity into something delicious.
Why Homemade Cheese Danishes Beat the Bakery?
Homemade Cheese Danishes come with a treasure trove of benefits that elevate them above their bakery counterparts:
- Quality Ingredients: You control what goes into your pastries. Using fresh, high-quality cream cheese, butter, and even homemade pastry dough means every bite bursts with flavor.
- Customization: Want to add a splash of lemon zest or a hint of vanilla? You can personalize your Cheese Danish Delight to suit your taste preferences.
- Freshness: There’s nothing quite like the taste of a warm pastry right from your oven. The freshness can’t be matched by any bakery item sitting on a shelf.
- Cost-Effective: Making Cheese Danishes at home is often more economical than purchasing them from a café or bakery, especially when you can whip up a batch for family and friends.
- Quality Time: Baking is an experience that can be shared with loved ones, making it a great opportunity for bonding. Imagine rolling out dough together, filling each pastry, and then enjoying the delicious results.
By choosing to make this delightful recipe at home, you’re crafting not only food but memories. So roll up your sleeves and prepare to savor each moment of the process as you embark on your Cheese Danish Delight adventure.
Key Ingredients for Cheese Danish Delight Recipe
Creating the perfect Cheese Danish Delight requires a particular blend of ingredients that work harmoniously to deliver a flaky pastry and a rich, creamy filling. Here’s what you need:
All-purpose flour: This ingredient serves as the foundation for our flaky dough. Its versatility allows for a tender yet sturdy base that puffs up beautifully while baking, giving you that signature Danish texture.
Unsalted butter: For a rich, buttery flavor, unsalted butter is essential. It not only adds depth but also contributes to the flakiness of the pastry layers, making each bite a delight.
Cream cheese: The star of our filling! Cream cheese creates that irresistible creamy texture that blends perfectly with other flavors, ensuring each bite is decadently smooth.
Sugar: To strike the right balance of sweetness, sugar plays a key role in both the dough and the filling. It enhances flavors without overwhelming your taste buds.
Egg and milk: Using a blend of egg and milk for the egg wash achieves that irresistible golden finish on top of your Cheese Danish. The result? A visually stunning treat that beckons to be savored.
Why You’ll Love This Cheese Danish Delight Recipe
When you dive into the Cheese Danish Delight recipe, you’re not just making a pastry; you’re crafting a moment of bliss that can transform any day into a special occasion. Whether you’ve just come home after a long day or are gearing up for a cozy weekend brunch with friends, this delightful treat offers comfort in every bite.
Perfect for beginners and seasoned bakers alike
The beauty of this Cheese Danish Delight recipe lies in its simplicity. Whether you’re a novice excited to try your hand at baking or a seasoned pro looking for a quick indulgence, this recipe accommodates everyone. With straightforward steps and easy-to-find ingredients, you’ll feel a sense of accomplishment as you create a bakery-worthy masterpiece right in your kitchen.
Versatile filling options for every preference
One of the best parts about this recipe is its versatility. While traditional cream cheese filling is a classic choice, feel free to mix things up! How about adding a touch of lemon zest for a refreshing twist? Or perhaps some fruit preserves for a touch of sweetness? The options are endless, allowing you to customize your pastry to suit your cravings and preferences.
Great for breakfast, dessert, or a sweet snack
Imagine starting your day with a warm, flaky cheese Danish alongside your morning coffee or enjoying one as a delightful afternoon pick-me-up. Not only does this Cheese Danish Delight recipe make for a scrumptious breakfast, but it also shines as a dessert or snack that pairs perfectly with tea. It’s an all-day treat you won’t want to miss!

Cooking Tips and Notes for Cheese Danish Delight Recipe
Creating the Cheese Danish Delight is all about taking your time and ensuring every component shines. Here are some valuable tips to elevate your baking experience and enhance those delightful flavors.
Make-ahead advice: Preparing dough in advance
One of the best parts about this cheese danish delight recipe is that you can prepare the dough ahead of time. You can make the dough the night before—just be sure to wrap it tightly in plastic wrap and store it in the refrigerator. This extra time allows the flavors to deepen, ensuring your Danish will be wonderfully flaky and flavorful. Just remember to let it sit at room temperature for about 15 minutes before rolling it out, so it’s easier to work with.
Tips for achieving the perfect bake
To achieve that golden, flaky texture, ensure your oven is properly preheated. Using a baking stone can help maintain an even temperature. Additionally, brushing your Danishes with an egg wash before baking gives them that beautiful golden hue. If you want to add a touch more flavor, consider sprinkling a little coarse sugar on top prior to baking—it enhances the sweetness and crunch.
How to tell when your Danishes are done
Visual cues are your best friend here. Your Cheese Danish Delight is perfectly baked when they expand and turn a lovely golden brown. If you notice the filling bubbling slightly, that’s a good sign! You can also insert a toothpick into the pastry; if it comes out clean, your Danish is ready to enjoy. Trust your instincts and don’t rush this crucial step—your taste buds will thank you!
Serving Suggestions for Cheese Danish Delight Recipe
The Cheese Danish Delight recipe shines brightest when paired thoughtfully, creating a new narrative around this delicious treat. It’s not just about enjoying the pastry itself; it’s about crafting the perfect moment.
Ideal Beverages to Accompany Your Danish
- Coffee: A rich, bold brew enhances the creamy, sweet filling of the cheese Danish. Whether you prefer espresso or a classic drip coffee, the robust flavors complement each other beautifully.
- Tea: For a lighter option, consider pairing with a delicate herbal or chai tea. The spices in chai add a wonderful contrast to the pastry’s sweetness.
- Fresh Fruit: Serve it alongside slices of citrus or berries. The tartness of fruit cuts through the richness, balancing your palate.
Storing and Reheating Tips for Leftovers
If you happen to have leftovers of your Cheese Danish Delight, store them in an airtight container at room temperature for up to two days. For longer storage, freeze them for up to a month. When you’re ready to enjoy again, simply reheat in a 350°F oven for about 10 minutes, or until warm and flaky.
Elevating Your Presentation with a Glaze
A light glaze can elevate your Cheese Danish Delight recipe! Whisk together powdered sugar and a splash of milk or lemon juice until smooth, and drizzle it over the pastries just before serving. This not only adds a glossy finish but also an extra touch of sweetness that’s purely irresistible.
Time Breakdown for Cheese Danish Delight Recipe
Cheese Danish Delight Recipe offers a fantastic combination of flavors that is worth every minute spent in the kitchen. Here’s a helpful breakdown of the time you’ll need to prepare this delectable treat.
Preparation time
Get your kitchen ready! You’ll need about 30 minutes for ingredients prep, mixing the dough, and assembling the filling. This is where the magic begins!
Chilling time
Patience is key! Allow your dough to chill for at least 2 hours. This step is crucial for achieving that flaky texture we all love.
Baking time
Once chilled, bake your Danish for 25-30 minutes. Keep an eye on them for that perfect golden-brown finish.
Total time
All in all, you’re looking at approximately 2 hours and 55 minutes from start to finish, including chilling. Your Cheese Danish Delight will be well worth the wait!
Nutritional Facts for Cheese Danish Delight Recipe
Indulging in a Cheese Danish Delight Recipe means treating yourself to a delicious pastry without derailing your nutritional goals. Let’s take a closer look at what’s in this delightful treat, tailored for young professionals who appreciate balance in their diet.
Calories per serving
Each serving contains approximately 250 calories. It’s a satisfying option that allows for enjoyment without overwhelming your daily caloric intake.
Protein content
Enjoy about 6 grams of protein per serving. This boosts energy levels and keeps you feeling full longer, making it a great mid-morning or afternoon snack.
Sugar content
You’ll find around 10 grams of sugar per serving in this cheese danish delight recipe. While it’s sweet enough to satisfy your cravings, it’s a treat best enjoyed in moderation!
This delightful pastry pairs perfectly with coffee or tea, making it an enjoyable addition to your day!
FAQs about Cheese Danish Delight Recipe
When diving into the Cheese Danish Delight recipe, it’s common to have a few questions before you begin your baking adventure. Don’t worry; I’ve got you covered with some of the most frequently asked queries!
How can I make the dough easier to work with?
Handling dough can sometimes be a little tricky. For a smoother experience with your Cheese Danish Delight recipe, chilling the dough for about 20-30 minutes can make a significant difference. It allows the butter to firm up, making it easier to roll out without sticking. If your dough feels too soft, consider adding a bit more flour while kneading, but be careful not to overdo it—keeping it light is key for a flaky texture.
Can I add other flavors or fillings to the Cheese Danishes?
Absolutely! The beauty of the Cheese Danish Delight recipe lies in its versatility. Feel free to spice things up by incorporating fruit, like fresh berries or even chocolate chips, into the cheese filling. A splash of vanilla extract or a hint of lemon zest can also elevate the flavor. Just aim for balance, so the added ingredients complement the creamy cheese filling.
How do I store leftover Cheese Danishes?
If you have any leftovers (which is rare!), store your Cheese Danishes in an airtight container at room temperature for up to two days. For longer storage, you can refrigerate them for about a week. To enjoy that fresh-baked taste again, consider popping them in the oven for a few minutes to reheat before serving. Enjoy your delightful treats!
Conclusion on Cheese Danish Delight Recipe
Recap of why you should try making this treat
Embracing the cheese danish delight recipe is an invitation to enjoy a warm, flaky pastry that perfectly marries a creamy cheese filling with a buttery crust. It’s delightfully simple to make and offers a touch of sophistication to any breakfast or snack moment. Whether you’re impressing friends or treating yourself, this pastry invites culinary creativity and comfort.
Encouragement to share your baking experience
As you delve into this delightful recipe, don’t be shy about sharing your baking successes and twists! We love hearing how others have made it their own. Snap a picture of your outcome and share your journey. Each experience brings us closer together and adds to our love of baking. Happy baking!

Danish Pastry
- Total Time: 1 hour 20 minutes
- Yield: 12 pastries 1x
- Diet: Vegetarian
Delicious homemade Danish pastries filled with cream cheese and topped with a simple glaze.
Ingredients
- 2 cups all-purpose flour
- 1 tablespoon granulated sugar
- 1 teaspoon salt
- 1 cup unsalted butter cold and cubed
- 1/2 cup cream cheese softened
- 1/4 cup powdered sugar
- 1 teaspoon vanilla extract
- 1 large egg beaten (for egg wash)
- 1 tablespoon milk for egg wash
Instructions
- In a large bowl, whisk together the flour, granulated sugar, and salt. Add the cold, cubed butter and use a pastry cutter or your fingers to mix until the mixture resembles coarse crumbs.
- Gradually add 1/4 cup of cold water, mixing until the dough comes together. Be careful not to overwork it. Shape the dough into a disk, wrap it in plastic wrap, and refrigerate for at least 1 hour.
- Preheat your oven to 400°F (200°C). Line a baking sheet with parchment paper.
- On a lightly floured surface, roll out the chilled dough into a rectangle about 1/4 inch thick. Cut the dough into squares, approximately 4×4 inches.
- In a medium bowl, mix the softened cream cheese, powdered sugar, and vanilla extract until smooth.
- Place a tablespoon of the cream cheese mixture in the center of each dough square. Fold the corners of the square towards the center to create a pocket and pinch to seal.
- In a small bowl, whisk together the beaten egg and milk. Brush the egg wash over each Danish.
- Bake in the preheated oven for 15-20 minutes or until golden brown. Let cool slightly before serving.
Notes
- For a sweeter touch, drizzle a simple glaze made from powdered sugar and milk over the cooled Danishes.
- You can also add fruit preserves or fresh berries inside the cream cheese filling for added flavor.
- Prep Time: 30 minutes
- Cook Time: 20 minutes
- Category: Dessert
- Method: Baking
- Cuisine: French
Nutrition
- Serving Size: 1 pastry
- Calories: 250
- Sugar: 5g
- Sodium: 300mg
- Fat: 15g
- Saturated Fat: 10g
- Unsaturated Fat: 3g
- Trans Fat: 0g
- Carbohydrates: 30g
- Fiber: 1g
- Protein: 3g
- Cholesterol: 40mg
Keywords: Danish, pastry, cream cheese, dessert